Please note if you are using our FutureSpam service, you will need to contact our support team once you have added the group so they can enable it on the FutureSpam portal - This process can take up to 24hrs
Step 1
Go to https://portal.office.com/
Step 2
Enter your Global Administrator Email Address and click Next

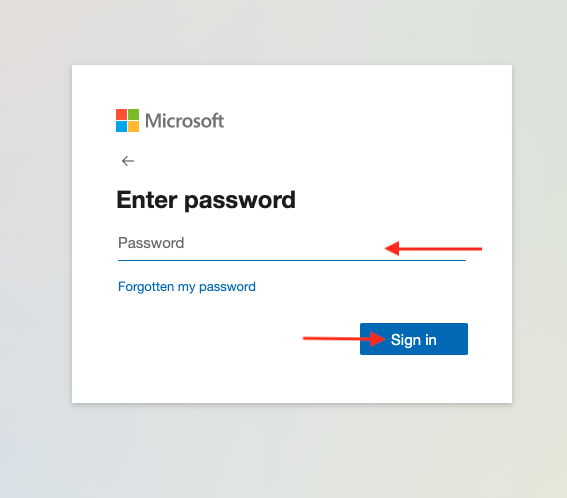
Step 3
Enter your Password and click Sign in
Step 4
Click Yes to stay signed in

Important Note: If you are asked to either sign in with Work or School Account or Microsoft Account, Please select Work or School Account
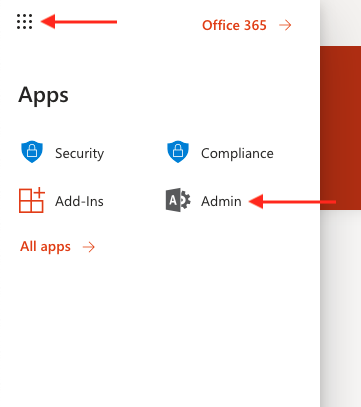
Step 5
Click the waffle icon (Nine Dots) then click Admin (If admin isn't listed click All apps)
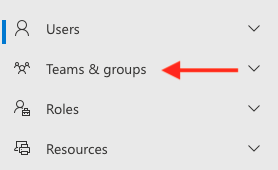
Step 6
Click Teams & groups
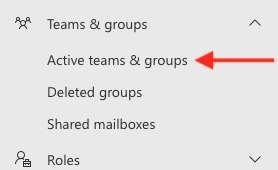
Step 7
Click Active teams & groups
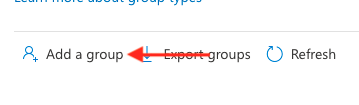
Step 8
Click Add a group
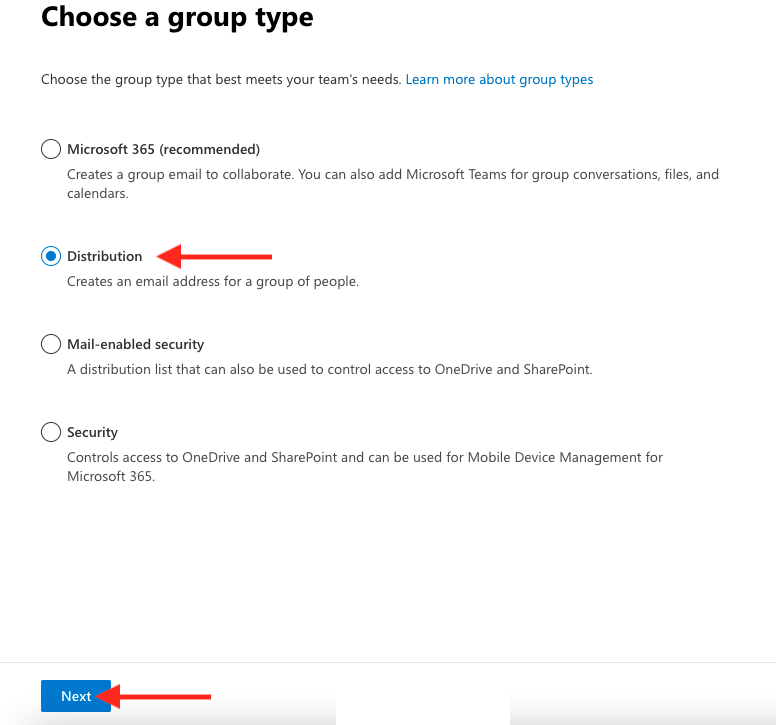
Step 9
Click Distribution, then Next
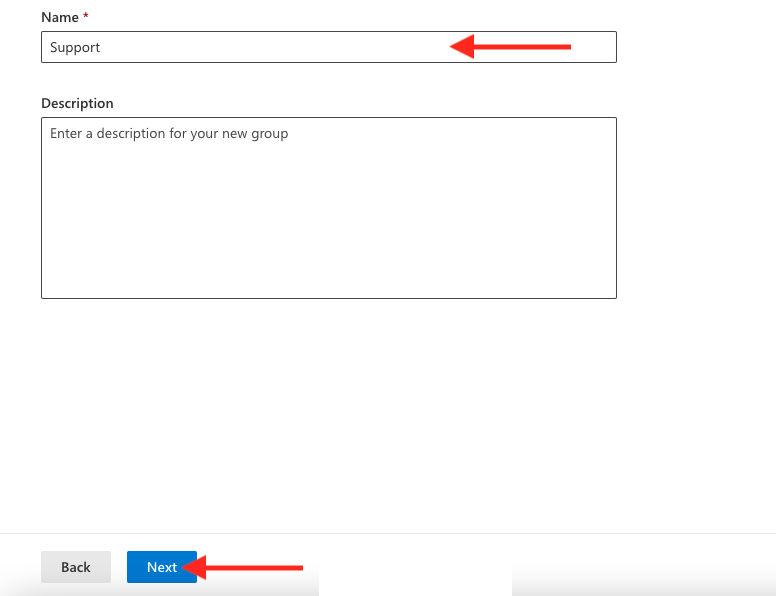
Step 10
Enter a Name for the group, then click Next
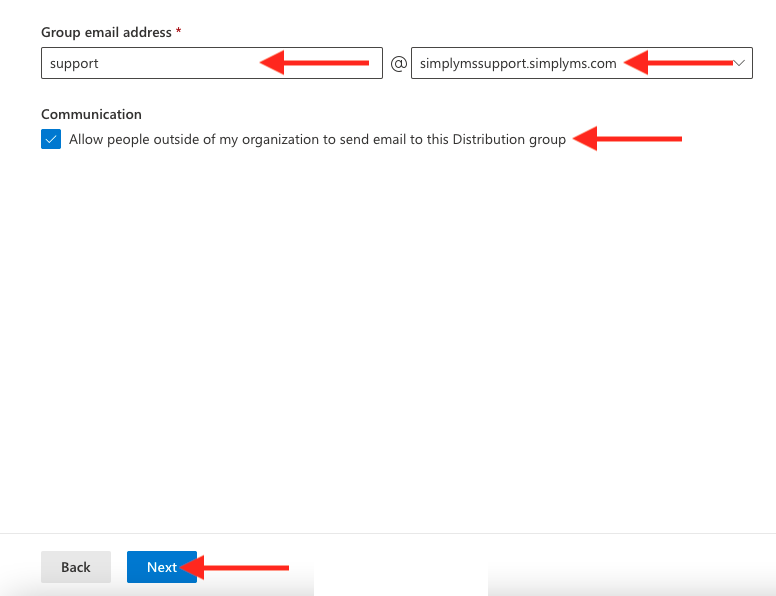
Step 11
Complete the following then click Next
Group Email Address
Domain for the Group
Optional: Tick "Allow people outside my organisation to send email to this Distribution Group" if you want to receive an external email
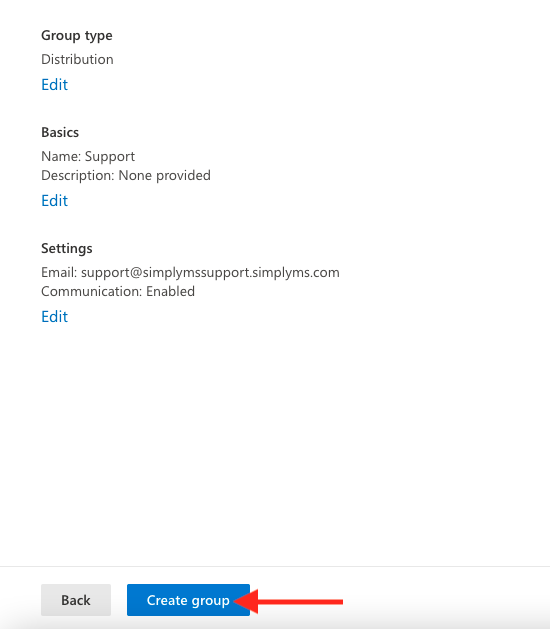
Step 12
Click Create group
Step 13
Click Close
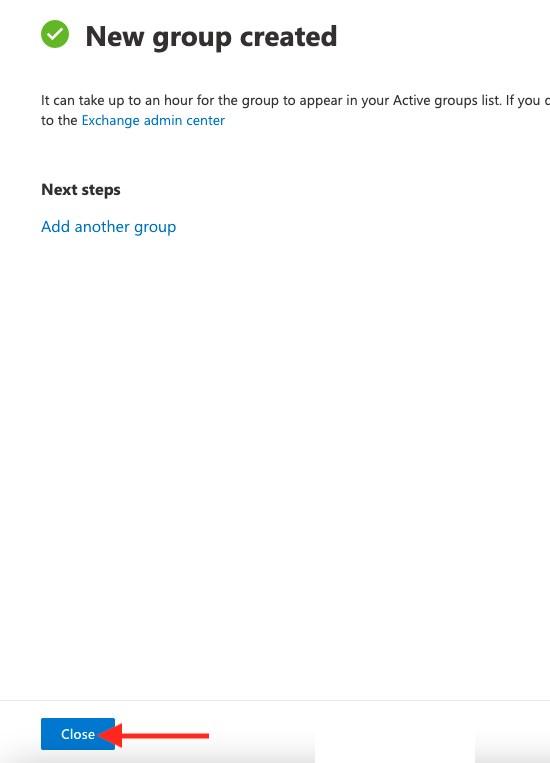
Step 14
Please allow 15 minutes for your group to show and become active
